Note: The Kindle edition of Dark the Dreamer’s Shadow is now available for pre-order! Paperbacks can be had on August 17. Keep an eye out for fun, exclusive Launch Day stuff by liking my page on Facebook!
In this golden age of digital self-publishing, there’s only one thing harder than writing a good book: selling it. Whether you’re going it alone or delegating some of the buzz-building to a paid PR team, marketing a self-published novel is a tough gig. A lot of authors make it even harder by failing to develop their product to its fullest potential before sending it out into the world.
An attractive cover is a good place to start, and targeting your audience appropriately can get the right eyeballs onto your work. But eBooks have additional mechanics that can make or break a reader’s good opinion.
While Amazon KDP, Smashwords, and other self-publishing platforms have started to do a lot of the formatting work automatically when authors upload their content, there are a few things that still have to be done manually.
One of the most important is the table of contents (TOC). Most eBook apps will hold a user’s place between sessions, but the absence of page numbers can make it very difficult for readers to flip back and forth between chapters without tabbing endlessly through the parts they’ve already read.
It’s easy to see why that’s a problem for non-fiction books that cover distinct subject matter in each chapter, but it can also be an issue for readers who want to review or clarify a convoluted family history or new technology that you introduced three hundred pages ago.
Creating a linked table of contents is not as complicated as it seems. If you have access to pretty much any version of Microsoft Word, the process can take just a few minutes. Here is a simple step-by-step guide to formatting your TOC in both Word 2003 and 2013, because some of us haven’t actually updated our software in the past decade and oh boy do I really need a new computer.
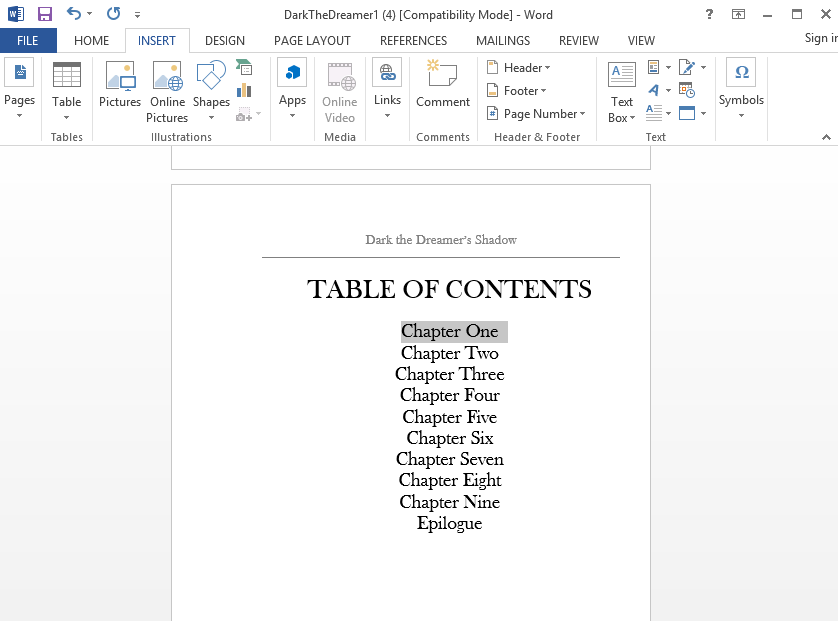
Make a table of contents page
The best thing to do is keep your eBook TOC pages pretty simple. A lot of fancy text formatting gets stripped out of your document when you upload it, so don’t worry too much about having all your chapter names or page numbers perfectly aligned or using a long string of ellipses for spacing or anything like that. Every electronic device will render it differently, and it’ll be very frustrating to the reader. Just do something like this:
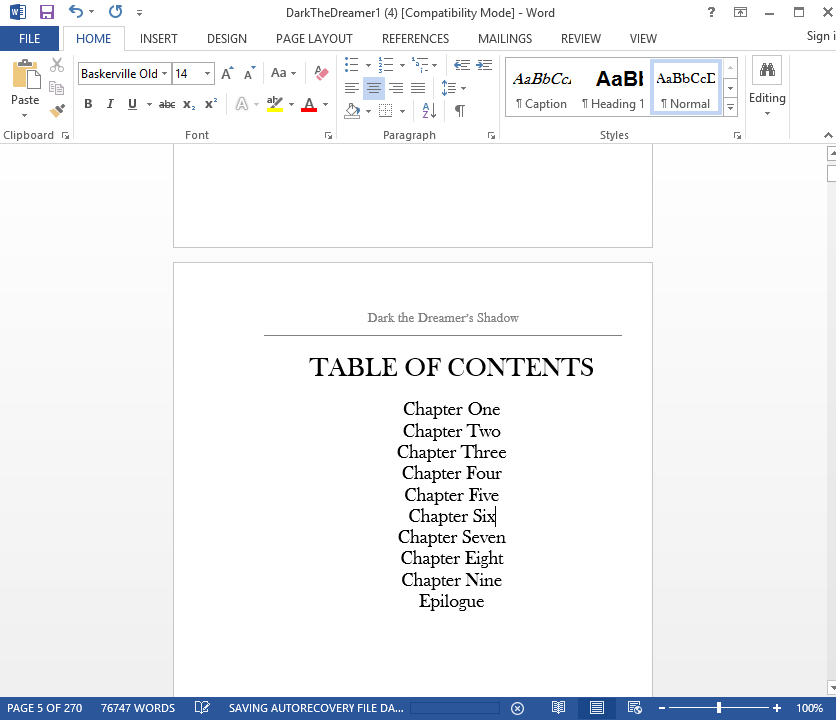
This page is going to be the first thing that your readers see when they flip past the title page and front matter, so you want it to be clean and easy to navigate. Make sure you include every point that you want a reader to be able to find easily. If you have fifteen chapters divided into three parts, be sure to include the “Part 1, 2, and 3” divisions so readers don’t have to guess which chapters fall under which acts.
Bookmark your chapter headings
There are two main technical tasks for creating a table of contents. The first is to bookmark your chapter headings.
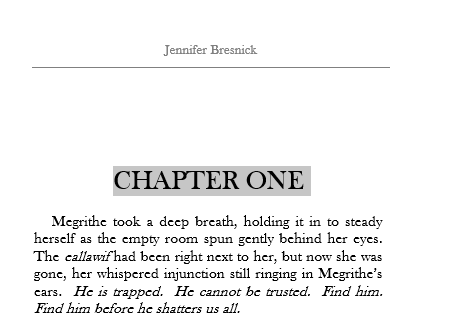
Step one: go to Chapter One in your manuscript and highlight the words that you want to use as your navigation point.
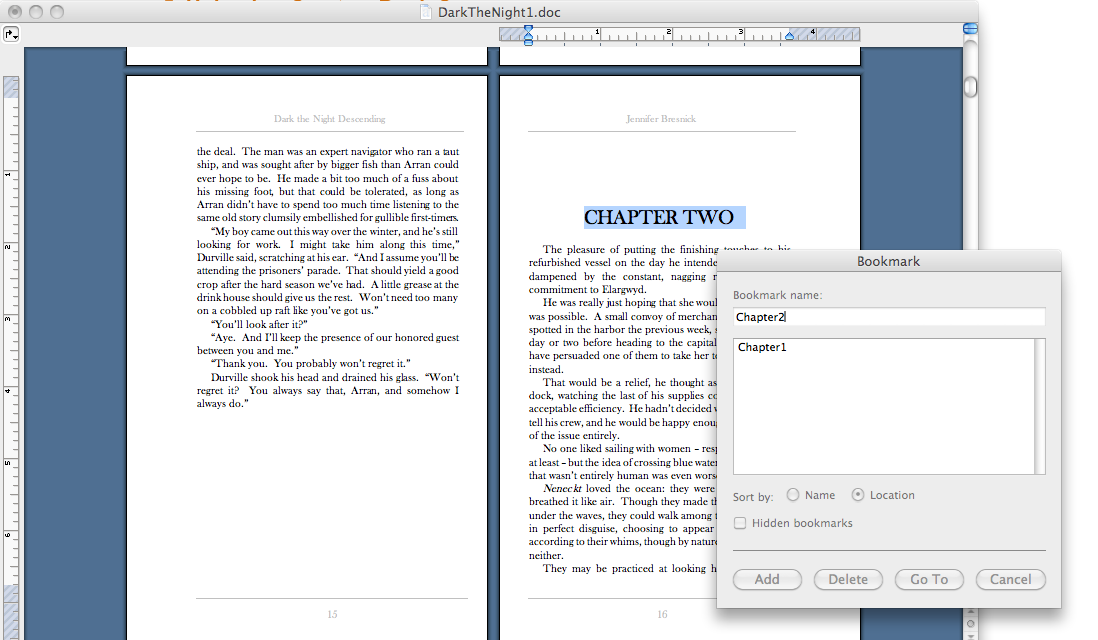
Next, in both old and new versions of Word, you must navigate to the “insert” tab or menu. In Word 2003, you will see a “bookmarks” option towards the bottom of the drop-down. In Word 2013, you will also have to click on the “links” tab and choose “bookmarks” from the little pull-out menu.

That will open a dialogue box that looks very similar in both versions of Word:
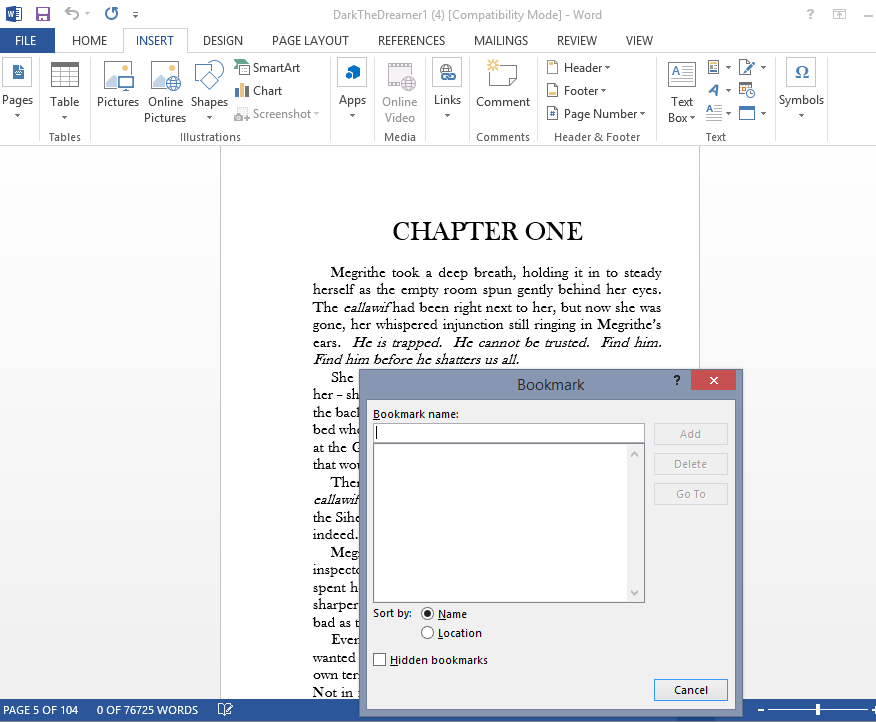
Name your bookmark something really creative like “ChapterOne”. It will have to be a single word with no spaces, but I believe underscores are okay.
Scroll through the rest of your document and repeat the same process for each navigation point.
Be sure to highlight the right section of text as you move through!
Link the bookmarks to the TOC page
When you have a nice long list of bookmarks, one for each chapter or text division, you can go back to your TOC page.
I’m sure you’ve all added hyperlinks to something at some point in your lives, so this isn’t going to be that complicated. To link Chapter One to its bookmark in the text, highlight “Chapter One” in your table of contents:
Right click and choose “hyperlink” from the menu (or use whatever shortcut gets you to the hyperlink menu). Here’s where things get different depending on what version of software you’re using. Let’s do Word 2003 first.
The hyperlink dialogue looks like this:
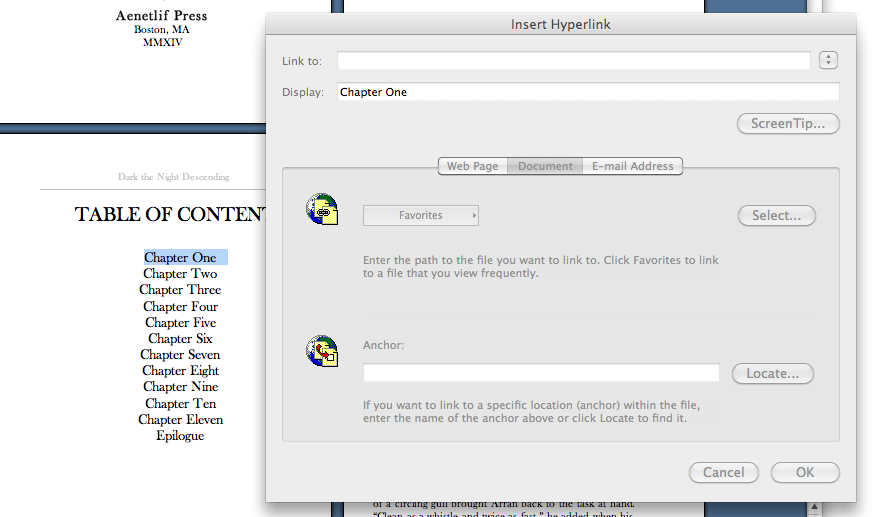
Instead of the “web page” tab in the middle there, move over to “document”
On the bottom, where it says “anchor,” you’re going to hit “locate,” which won’t be grayed out like that. Trust me.
That’s going to bring up this new box:
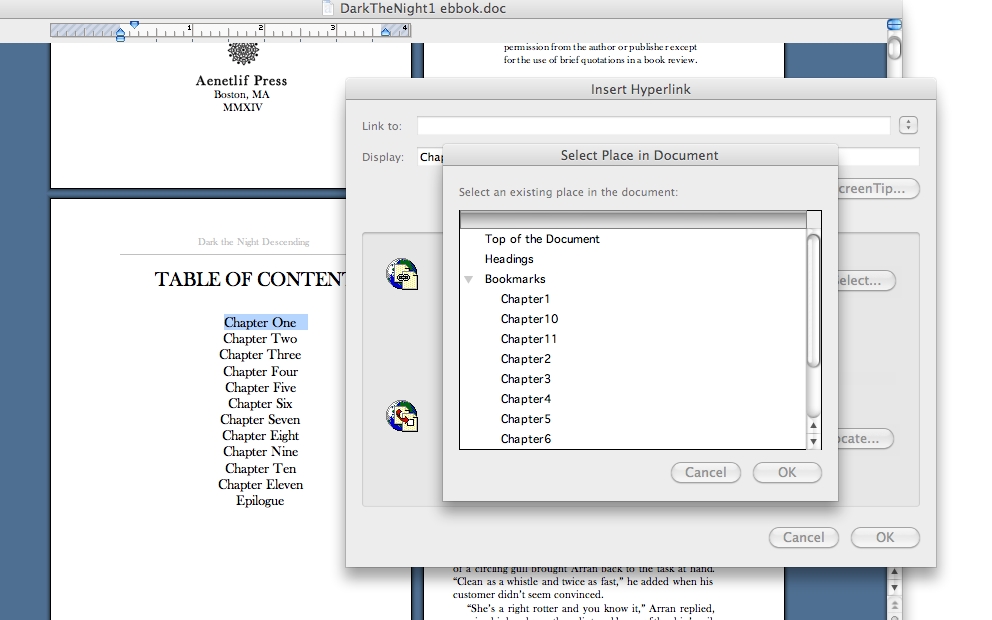
Just choose the corresponding bookmark and hit OK. The text on the table of contents page will turn blue and underlined, just like any other hyperlink you’ve ever seen. Job done! Repeat for the rest of your navigation points.
In newer versions of Word, the process is pretty much the same, but it just looks a little different.
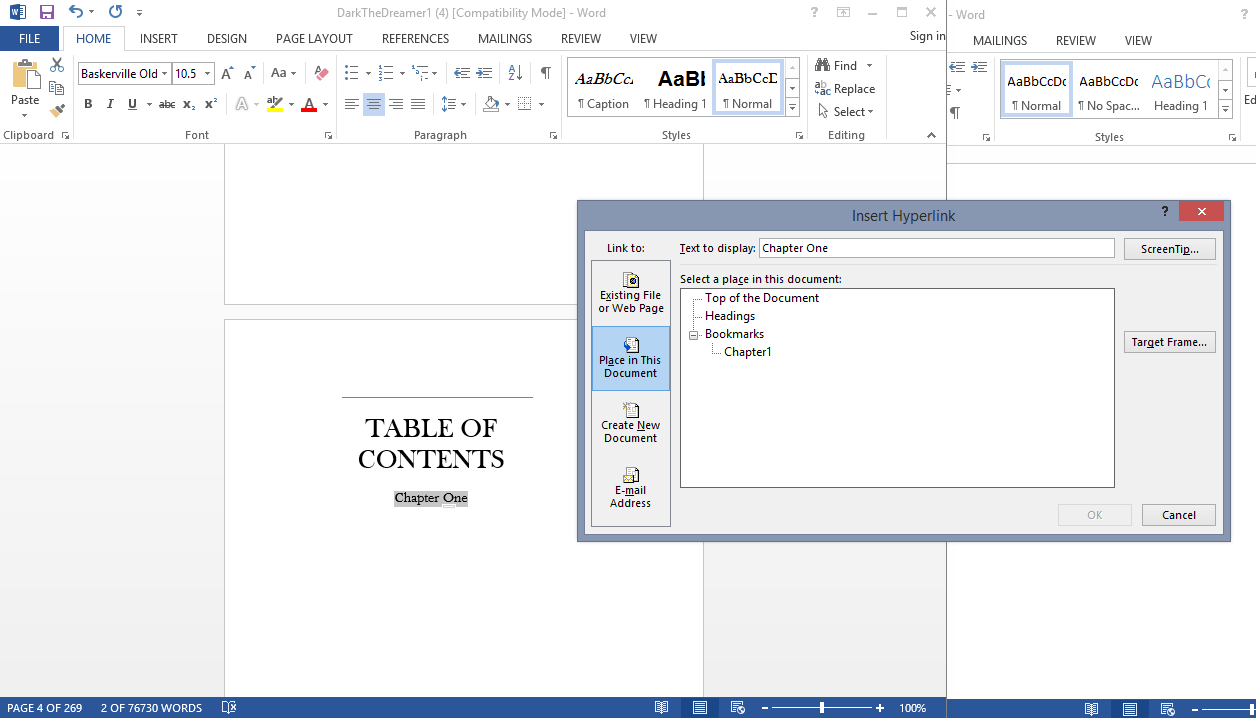
Highlight the appropriate text and go to the hyperlink menu. Instead of the “existing file or webpage” tab on the left-hand side, move down to the “place in this document” option. Choose your bookmark and hit OK. Now you’re done, too!
Profit!
You can test out your handiwork by clicking the links on the TOC page. You should jump right to the proper chapter heading or other navigation point. This formatting will carry over through the scraping and squishing process that most eBook uploaders use, so you shouldn’t have a problem with weird broken markup or anything like that.
Other fun things to do with this technique? Create a choose-your-own-adventure novel! Link unique or confusing terms to a glossary! Create a jump to a footnote (that then links back to the place where the reader left off)! I think you can probably even link to external webpages, but don’t quote me on that!
The possibilities for increased reader engagement and interactivity are endless, and using this simple trick can add a new dimension of polish and professionalism to your work. Readers are starting to expect this kind of pizazz, so it’s a good skill to master. Try it out in your next eBook and see what happens!

Thanks for this!
Thank you thank you thank you thank you! I spent 3 days trying to get this to work for a client as it’s my first time with Kindle. This made it super easy.
Great stuff, thank you
Thank you for simplifying this process for me! Like others mentioned, this is my first time formatting an e-book, and you saved me hours of time and spared me a few headaches.
Vow! That was great, Jen! Super easy!God bless!
This was by far the easiest tutorial! Thank you so much for the time you put into writing this!
This was so helpful! Every other article I read about how to add a TOC just made no sense to me. I really wanted to know how to do it myself, because I like to upload separately to KDP and Draft2Digital, and Amazon KDP doesn’t automatically put a TOC in. Also, their Kindle Create software thinks chapter numbers and chapter names are separate chapters, so that’s no help, either! So it’s great to be able to do it correctly myself, and your article made that easy.
I also love your idea about using links for characters in case people forget who they are! My mom had mentioned this problem before, so made a list of characters for a couple of my books. Now I can link the characters’ names to the character list!
My TOC’s are coloured blue…and when clicked…go to the desired destination ..but that’s when it’s in MS Word. However when I uploaded it to the Kindle Previewer…as a html doc…t doesn’t work. i.e it’s not clickable any longer..and I don’t see the ‘little hand’ hovering over the TOC. Any idea why this is happening?
Wonderful! I just did it! You are a good teacher! Thank you!!!